


Photo by Anja Bauermann on Unsplash
Project Development with Docker and VSCode Dev Containers
A Guide to Streamlining Your Project Workflow


Introduction:
Isolation is not always a bad thing in our life, such as sometimes we isolate ourselves from the rest of the world because we can work better in peace. Like our work from others' physical interventions, Developers isolate their projects from the rest of the other projects by containerizing them using Virtual systems, Dockers, and if needed totally separate Systems from the rest of the world (such as Nuclear power plants, weapon research, and Virology research).
What are Docker and Containerization?
Docker is an open-source platform that enables the creation, deployment, and management of containerized applications. It provides a set of tools and technologies for building and running applications in containers, including a command-line interface (CLI), a Desktop application, an engine for creating and managing containers, and a registry for storing and sharing container images.
Docker allows developers to package their applications and dependencies into a single container (containerization), making it easy to run and manage the application in any environment. Containers are lightweight, portable, and isolated from the host system and other containers, ensuring consistent behavior and reducing the risk of conflicts or compatibility issues.
Install Docker :
I assume you already have VSCode installed in your system. So don't want to waste your valuable time on it. In case you don't have it just visit VSCode.
For Docker installation, It is easy with the Docker Desktop application. Just go to Docker Desktop and download your system-specific executable.
For Ubuntu or POPOS download the .deb file and double-click it. Follow instructions.
Now open from the application menu, after it opened go to your terminal and type docker --version , It will produce something like that Docker version 20.10.22, build 3a2c30b
Voila, You have successfully installed Docker in your system.
Dev Container
Now,
create a directory
mkdir dev-container-tutorialChange the dir to it
cd dev-container-tutorialand
code .Now go to the activity bar on the left side and open extensions.
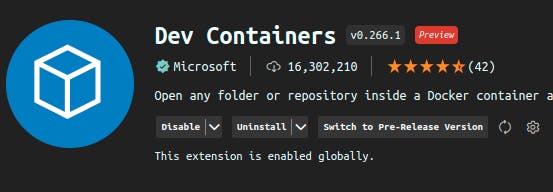
type dev containers and install the Microsoft Dev Containers extensions.
You have all set up to do the main part.
What is the speciality of that extension?
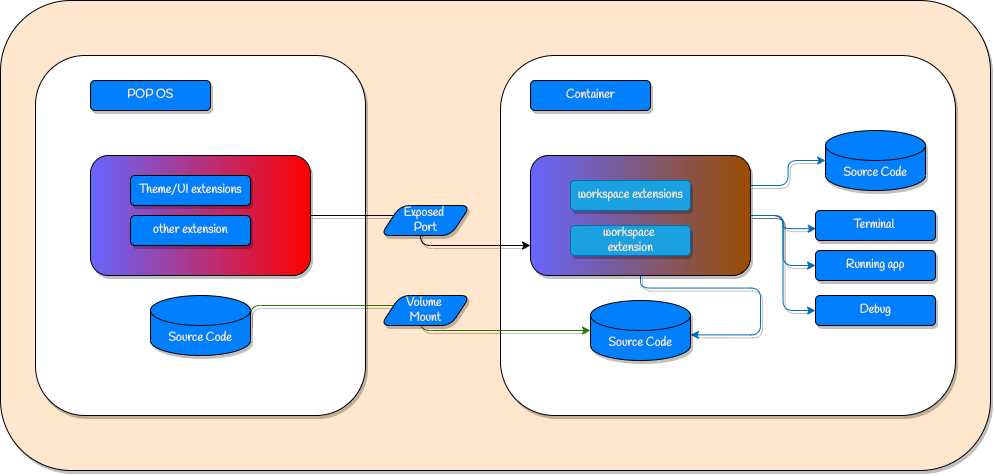
The Dev Containers extension for Visual Studio Code enables developers to utilize a Docker container as a comprehensive development environment. By opening a folder within, or mounting it into, a container, developers can access all of Visual Studio Code's features. The devcontainer.json file in the project provides VS Code with instructions on how to access or create a development container with a specific toolset and runtime stack. This container can be utilized to run an application or to isolate tools, libraries, or runtimes required for working on a codebase.
Now, create a new folder named .devcontainer in the dev-container-tutorial folder. VSCode Devcontainers extension will detect this folder and its content automatically.
Imagine you have got a Freelance project where you have to use python 3.11 as your Interpreter but you don't want to install it in your system and also you have to share the Env configuration with your client. Your working machine is Pop OS but you don't know which OS your clients have. So, what is the solution?
Solution: Dev Containerization, lets begin
.devcontainer folder contains two files
devcontainer.json - This file in your project folder will tell VSCode, How to access the dev container and its toolsets.
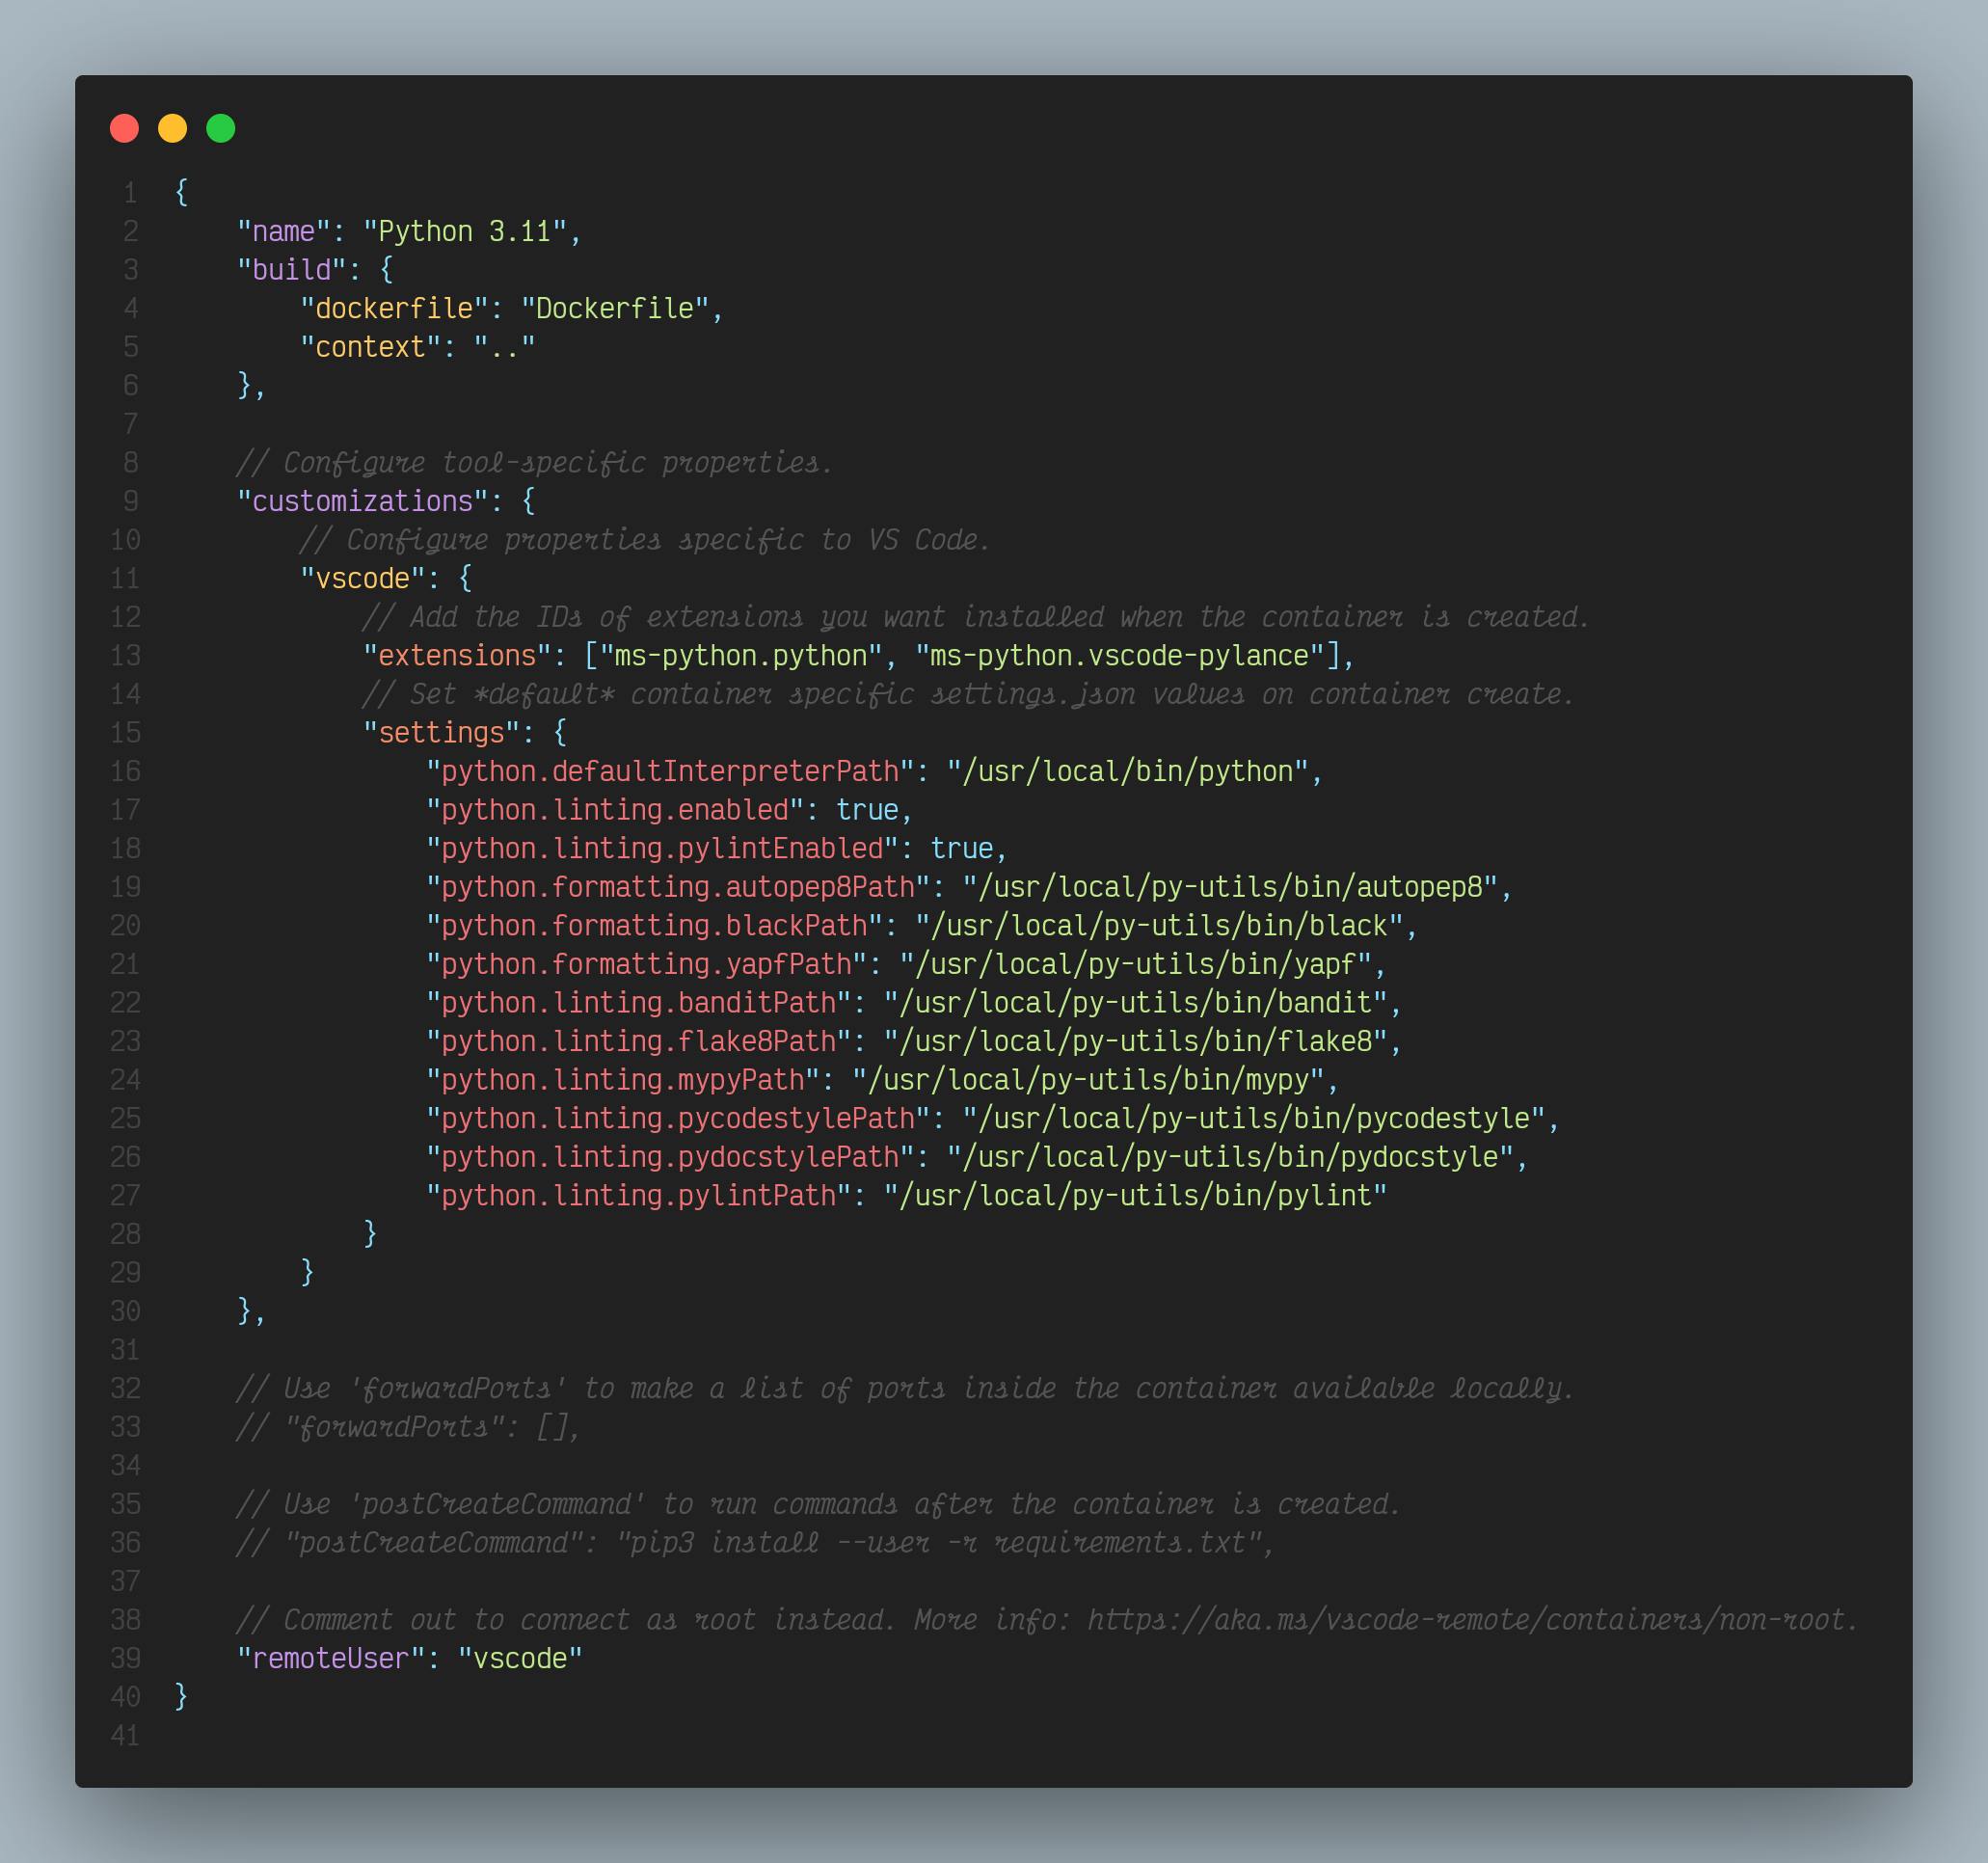
In the above JSON file
"name":is the name of the Container Image you want to build."build":"dockerfile":to direct the Dockerfile location."customization"the scope is used to customize the VSCode instance of your docker container. In there you can add a number of extensions you need in"extension":, Important settings required for your development in"settings":"remoteUser":you can add the remote user as root and also vs code.
Dockerfile - a Docker file is a text file without
.txtextension, It contains all the command instructions for Docker to How it will build the docker image.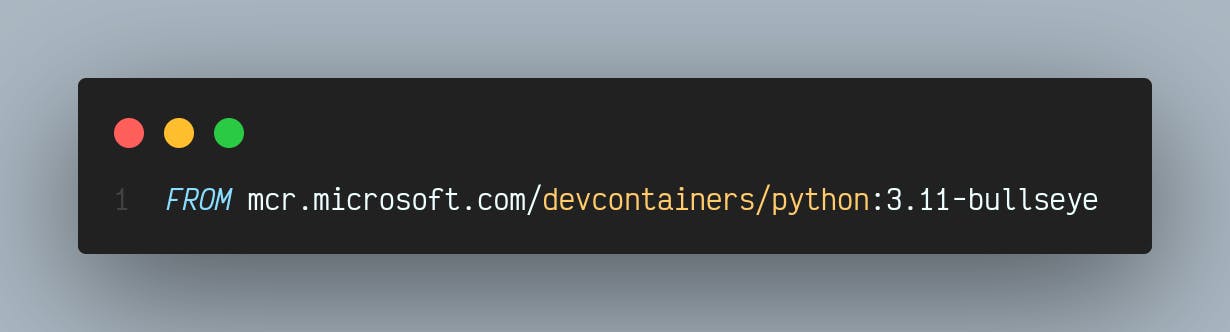
In the Dockerfile the FROM command will pull the images of python 3.11 image from the Microsoft dev containers link.
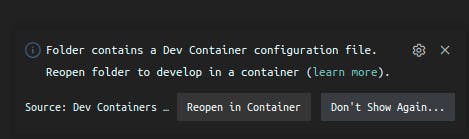
Now if you open and restart the VSCode then the extension will automatically detect the .devcontainer folder and its content, and you will get a pop-up like below. Just click the Reopen in Container option. It will create the Docker Image from the Dockerfile, Install all the necessary extensions, and set up a VSCode with the settings you have in the devcontainer.json file.
Now, You see the dev container name on the left bottom corner of your VSCode.
That's it, You can enjoy your Python3.11 or develop something with it. It will separate from your entire system. If you close your VScode after work it will stop the container automatically.
NOTE: Start the Docker Desktop client before trying to run your dev container in VSCode.
That's it. Thank you for reading.😊
If you like my article please like, comment, and share.